- August 30, 2020
- Posted by: Syed Shujaat
- Category: Uncategorized
How to configure NTP server in Active Directory, Step by step
Active Directory can’t work correctly if the clock is not synchronized around domain controllers and member machines.
Some of the services that rely on the correct time configuration is Kerberos, which by default, computers that are more than 5 minutes out of sync will not authenticate to domain. Another example is replication, Active Directory uses timestamps to resolve replication conflicts, etc.
-
In Active Directory, we use the Windows Time service for clock synchronization: W32Time;
-
All member machines synchronize with any domain controller;
-
In a domain, all domain controllers synchronize from the PDC Emulator of that domain;
-
The PDC Emulator of a domain should synchronize with any domain controller of the parent domain: using NTP;
-
The PDC Emulator of the root domain in a forest should synchronize with an external time server, which could be a router, another standalone server, an internet time server, etc.
Most Common NTP Time source.
server 0.pool.ntp.org
server 1.pool.ntp.org
server 2.pool.ntp.org
server 3.pool.ntp.org
You can have a better idea about this flow in the following picture:

Configuration
From your PDC, open the prompt as administrator and type:
w32tm /config /manualpeerlist:yourNTPserver,0x8 /syncfromflags:manual /reliable:yes /update

w32tm /resync /rediscover

net stop w32time && net start w32time

Note the ",0x8" is part of the command and it will set the PDC to force sending client requests to the specified NTP server, and not other different type of requests like symmetric, which could cause PDC to do not receive correct NTP answers.
Also, should you wish to add more than one NTP server in the command above you should put them within quotes and separated by a space, like that:
w32tm /config /manualpeerlist:"yourNTPserver1,0x8 yourNTPserver2,0x8" /syncfromflags:manual /reliable:yes /update
Confirm if your server is properly configured:
w32tm /query /status
The output from the command above should show the peers you configured, if not something is wrong, double-check firewall and other settings, more troubleshooting details below.
Once the PDC was correctly configured, force all other DCs to rediscover the new time server by configuring it to Domain Hierarchy with the commands below:
w32tm /config /syncfromflags:DOMHIER /update
w32tm /resync /nowait
net stop w32time && net start w32time
Check settings after a minute, it should show your PDC/Time Server:
w32tm /query /status
Once the commands above were executed in all DCs, check the NTP settings for them with the command below:
w32tm /monitor
The correct and expected output should be the PDC/NTP with Stratum = 3 and all other DCs with Stratum = 4
Virtual Server?
Don’t forget, if your PDC is a virtual machine hosted on a Hyper-V server, you have to disable the time synchronization in your VM settings. To do that follow the instruction below:
1 – Open Hyper-V Manager.
2 – Select the Virtual Guest DC
3 – Click Settings.
4 – Click Integration services.
5 – Clear the Time Synchronization option.
6 – Exit Hyper-V Manager.
7 – Restart the server.
Screwed up configuration, what now?
Don’t worry, you can restore time service to its default value:
net stop w32time
w32tm /unregister
w32tm /register
Errors?
If you are facing Event ID errors 47, or if your configuration has the source configuration set as “Local CMOS Clock“, try:
1 – Do the above procedures again and be sure to set “,0x8” immediate after the NTP address without any spaces.
2 – Make sure you can reach your external NTP server through port UDP 123.
3 – Restart your server and try again.
4 – Make sure you don’t have any other NTP setting being applied on your domain through GPO.
5 – Make sure your current time is not as far as 1000 seconds from the real time.
6 – Make sure your server is set at the right zone time.
7 – You can also check for time advertisement on the PDC by running this command w32tm.exe /resync /rediscover /no_wait, then check for Event ID 139
8 – You can check the registry entries if the domain controller is using NTP (should be on PDC) or NT5DS (on non-PDC):Find the value of Type under:
HKEY_LOCAL_MACHINE\SYSTEM\CurrentControlSet\Services\W32Time\Parameters
How to Configure NTP Server in Windows 2012 r2 Step by Step
There are a couple of methods you can follow. We will be sharing one by one in the following sections.
Method 1:
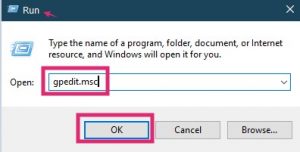
- First, right-click on the ‘Start’ button and click on the ‘Run’ option from there
- Next, type in ‘gpedit.msc’ on the box and click on ‘OK’ or press the ‘Enter’ key
- In doing so, the ‘Local Group Policy Editor’ window will open up
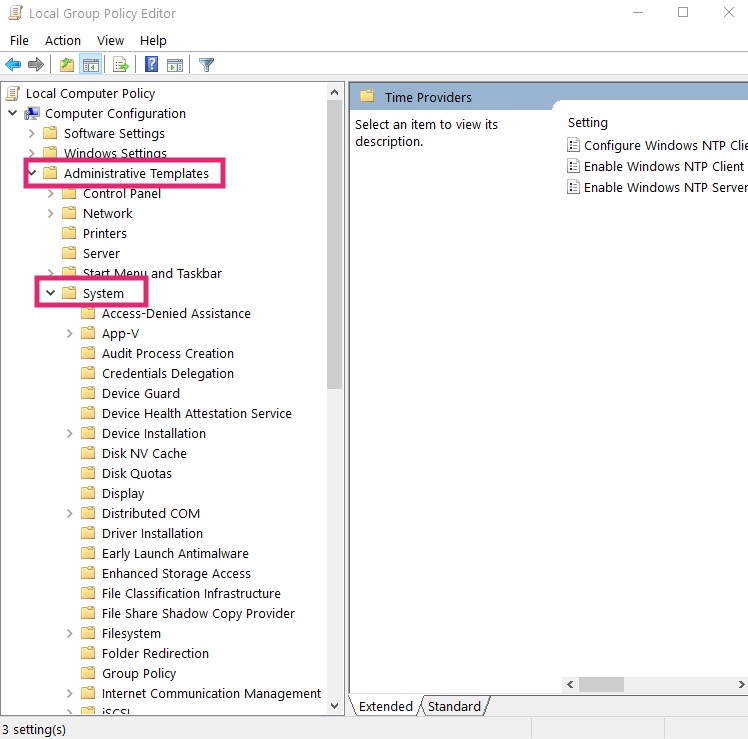
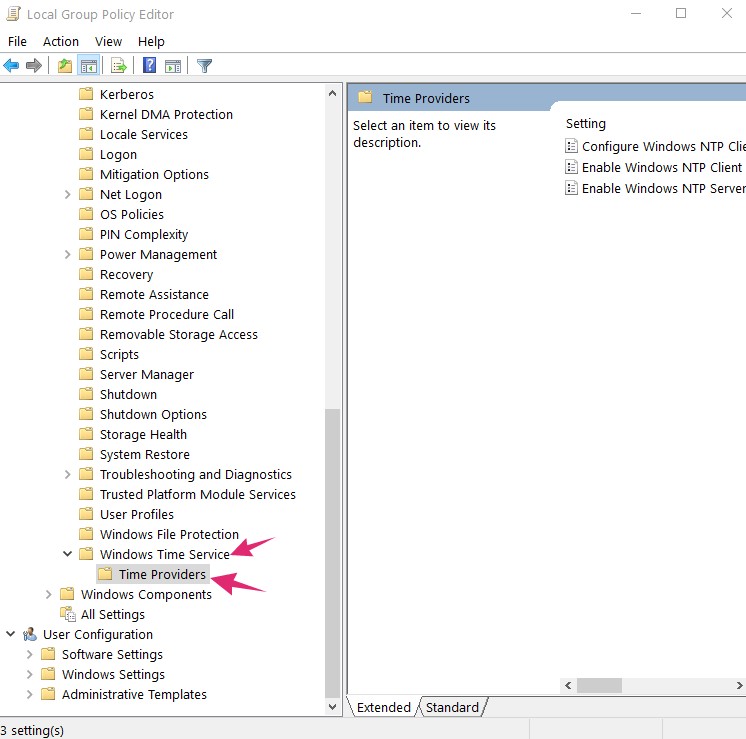
- From the left pane of the new window, you will have to navigate to ‘Administrative template>System>Windows Time Service>Time Providers’
- Now, you will have to open the ‘Enable Windows NTP Server’ option from the right pane
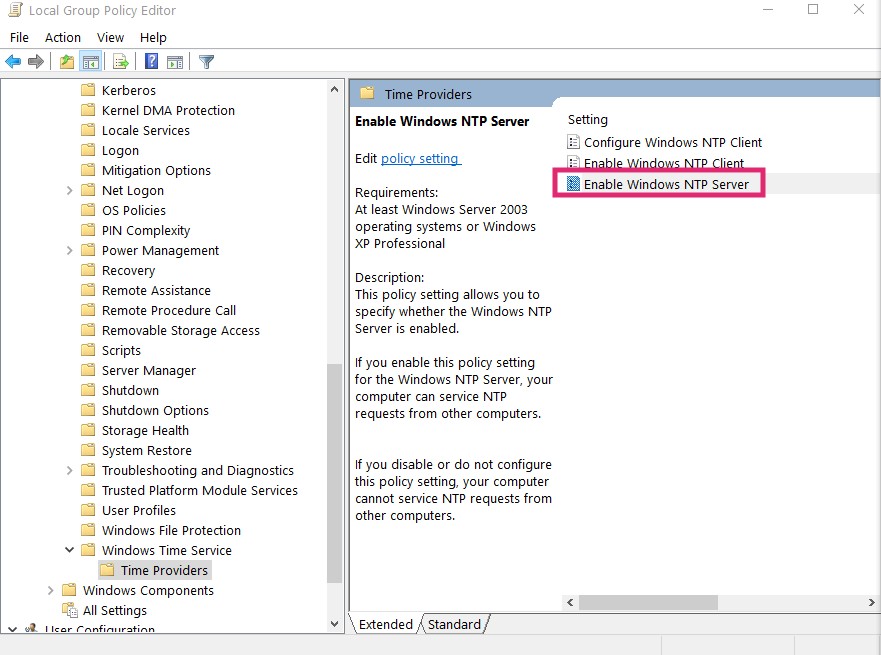
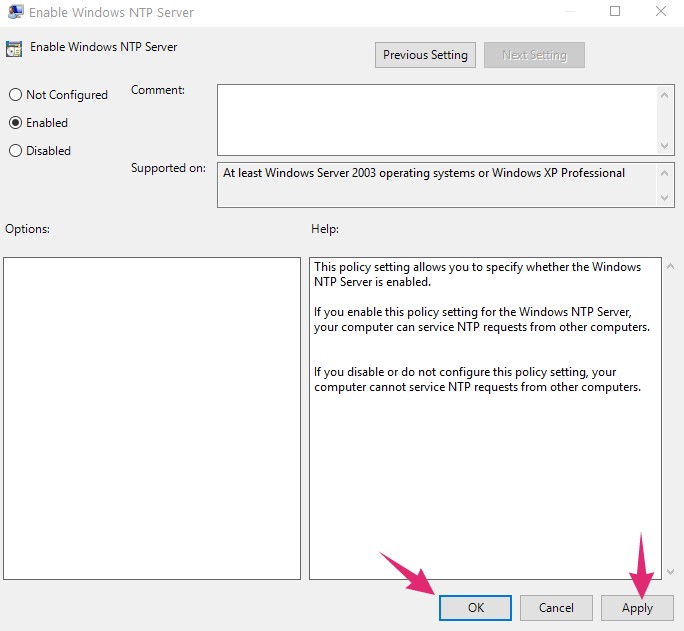
- Next, checkmark the ‘Enabled’ option on the upper left corner from the new popup window
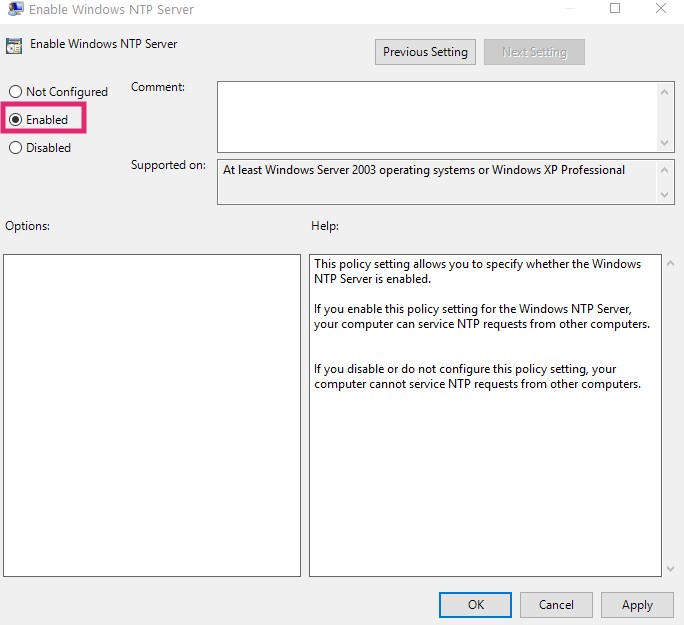
- Close the window by clicking on the ‘OK’ or ‘Apply’ button
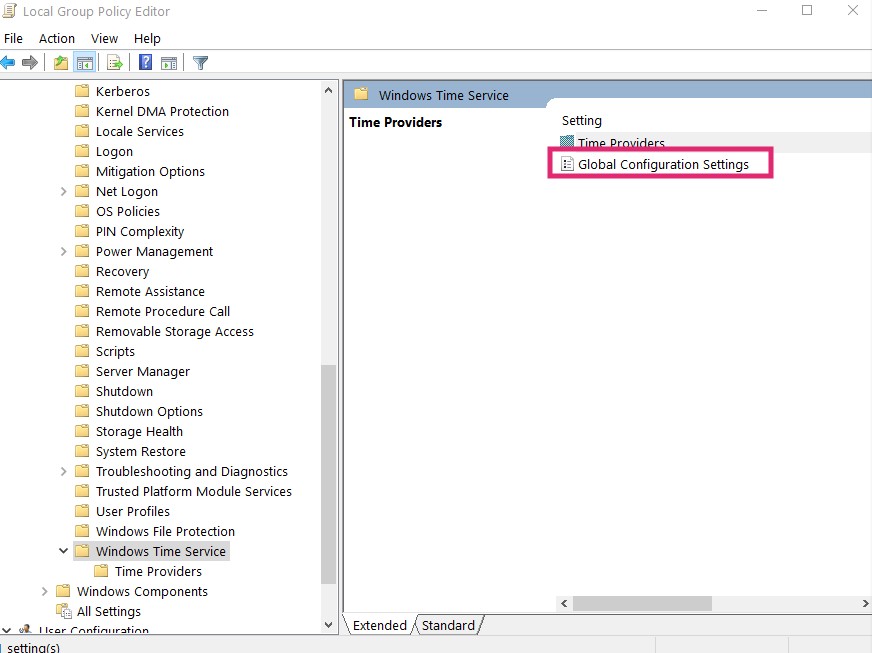
- Now, select the ‘Windows Time Service’ option from the left pane once again

- And, open the ‘Global Configuration Settings’ option from the right pane
- Again, checkmark the ‘Enabled’ option on the upper left corner from the new popup window
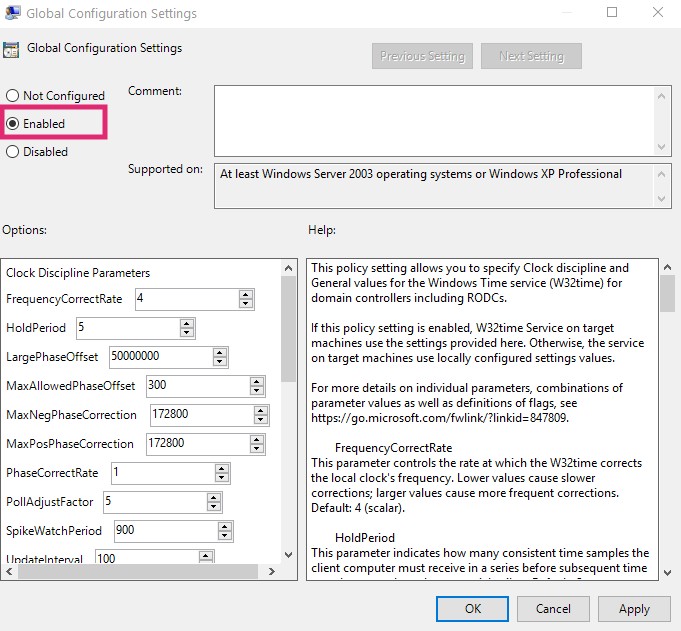
- Also, you have to change the ‘AnnounceFlag’ to ‘5’
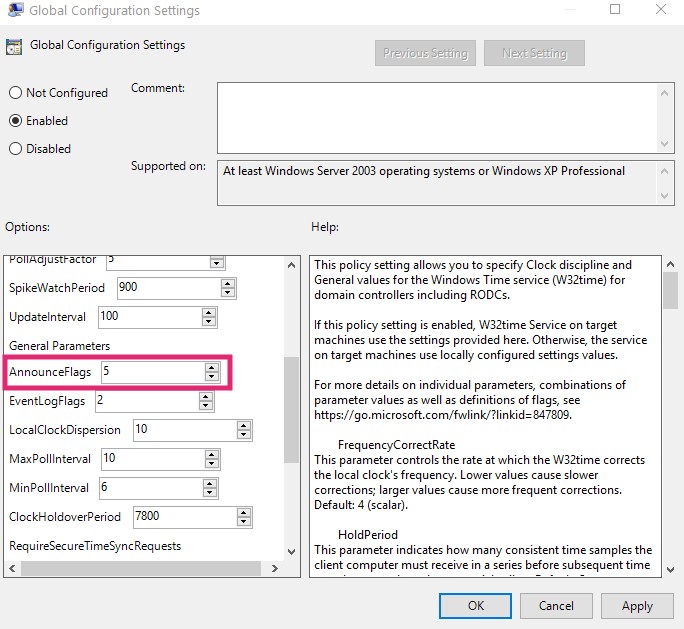
- And click on the ‘OK’ button from the bottom right corner
- Finally, close the ‘Local Group Policy Editor’ window
At this moment, you will have to open the ‘Server Manager’ on your machine. And, follow accordingly…
- After opening the ‘Server Manager’, click on ‘Tools’ and then select ‘Services’
- Now, scroll down and right-click on the ‘Windows Time’ option
- Then click on ‘Start’ or ‘Restart’ from the submenu