- April 10, 2020
- Posted by: Syed Shujaat
- Category: CITRIX, Desktop Solutions
Windows 10, File Explorer opens to Quick Access by default. Quick Access displays frequently accessed folders (maximum of ten) and recently accessed files (maximum of twenty) so that you can easily access your recently accessed files and frequently accessed folders without navigating to them.
Windows users who have accustomed to seeing This PC or Computer upon launching File Explorer might want to get This PC or Computer in Windows 10 as well. Luckily, it’s now possible to make File Explorer open This PC instead of the Quick Access.
METHOD 1
Step 1: Click on the File Explorer icon in the taskbar to open Quick Access. Alternatively, you can open up any folder or drive.
Step 2: Click the File menu and then click Options or Change folder and search options to open the Folder Options dialog.

Step 3: Here, under the General tab, select This PC from the drop-down menu right next to Open File Explorer to option.

Step 4: Finally, click the OK button. That’s it! You don’t need to restart or log out to see the change. From now onwards, File Explorer will always open to This PC instead of Quick Access.
METHOD 2
If you are unable to set File Explorer to This PC in Windows 10 using the methods mentioned above, you can manually edit the Registry to do so.
We recommend you create a manual system restore point before editing the Registry or create a backup of the Registry key that you’re going to edit.
Step 1: Run Registry Editor. To do so, type Regedit in the Start/taskbar search box and then press Enter key. Click the Yes button when you see the UAC prompt.
Alternatively, you can type Regedit in the Run command box and then hit Enter to open Registry Editor.
Step 2: In the Registry Editor, navigate to the following key:
HKEY_CURRENT_USER\Software\Microsoft\Windows\CurrentVersion\Explorer\Advanced
Step 3: On the right-side, look for the value titled LaunchTo. Double-click on LaunchTo and then change the Value data from 0 to 1 to make File Explorer always open to This PC. Click OK.


Close the Registry Editor. Good luck!
METHOD 3 :
How to change the default save location in Windows 10
- Open the Settings app.
- Click on System and then on “Storage” from the side-bar on the left.
- Scroll down to the bottom of the page, where it says “More Storage Settings”.
- Click on the text that reads “Change where new content is saved”.
You are taken to a new screen which displays the default save locations for six different types of data: Apps, Documents, Music, Photos and Videos, Movies and TV Shows, and Maps.
Each of these options is set to “This PC” by default. To change the default save location click on the menu next to a data type and pick one of the available locations from the menu that opens; Windows 10 lists all partitions that are available on the computer.
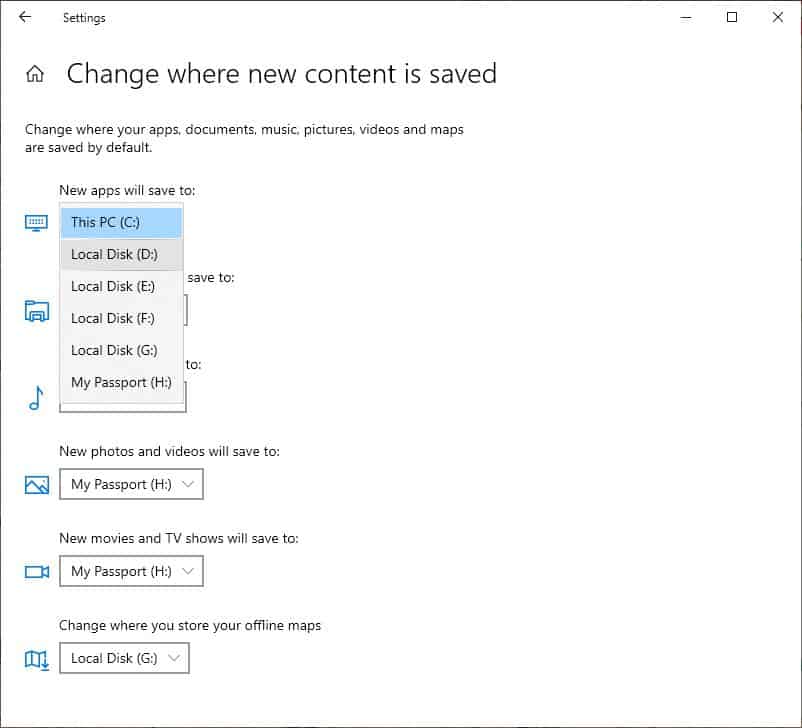
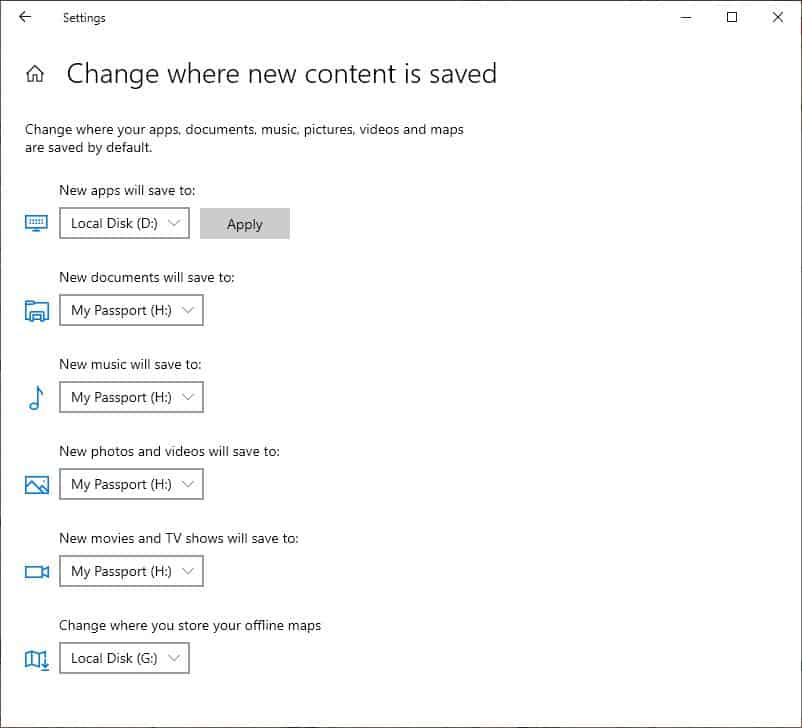
If you want to change the save location of Apps, simply click the button next to the icon and select a different drive. Click on the apply button which appears. You will see a progress cursor, wait for a few seconds and it should be done. You will have to repeat this for each of the 6 options if you want to change the save location for each of the data types.