- December 4, 2020
- Posted by: Syed Shujaat
- Category: CITRIX
StoreFront 3.6 and later provides an API for NetScaler Gateway to query basic StoreFront information which assists NetScaler Gateway administrator to set up and export a gateway configuration document that can be imported using the StoreFront Management Console or PowerShell.
This feature eliminates the need to specify similar settings with the same values in two places that is error-prone. This is supported by NetScaler Gateway 11.1 48.10 and later.
This blog provides a step-by-step guide for configuring NetScaler Gateway deployment with StoreFront 3.6 using the new simplified NetScaler Gateway configuration feature.
Step 1 – Configure StoreFront for LAN Access
Download the Storefront 3.6 (or latest) from Citrix Download page and deploy the Storefront inside the corporate network. To provide secure remote access for users outside the LAN the configured StoreFront host base access URL is given to NetScaler Administrator.
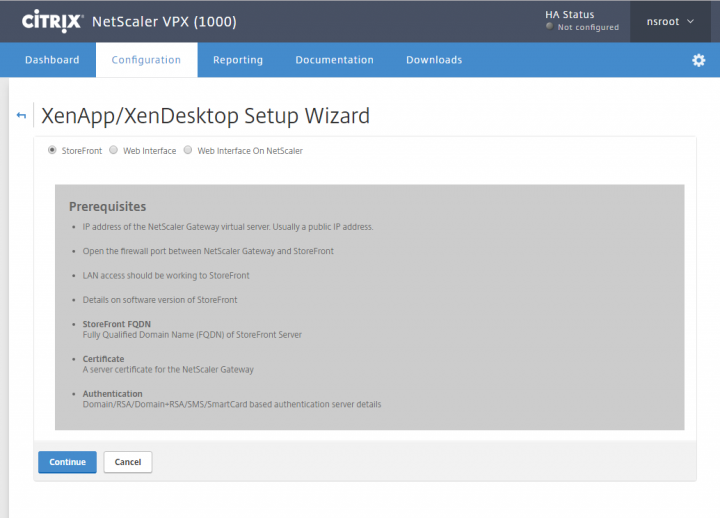
Step 2 – Deploy Netscaler Gateway and enter StoreFront URL
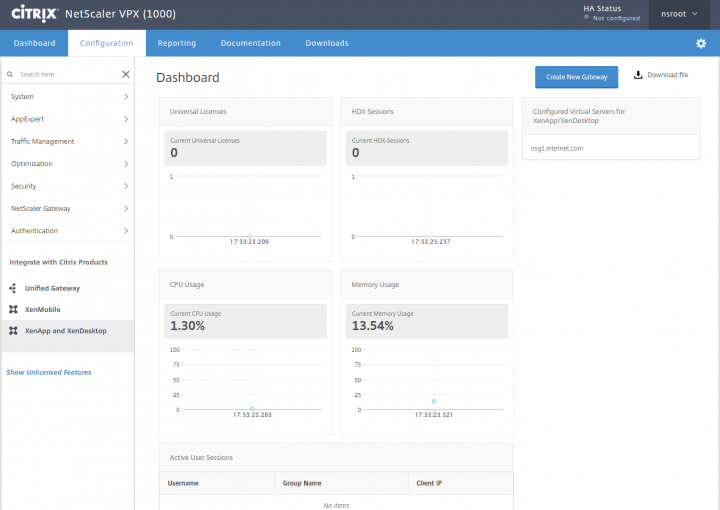
Download the NetScaler Gateway 11.1 Build 50.10 VPX for XenServer from Citrix download page and import it on a XenServer. Then perform the basic setup of NetScaler configuration, assigning it with the administration address, and uploading the license file. Log in to the NetScaler Admin portal and select Xenapp and XenDesktop deployment wizard and click ‘Get Started’ button to give the screen for selecting StoreFront setup wizard.
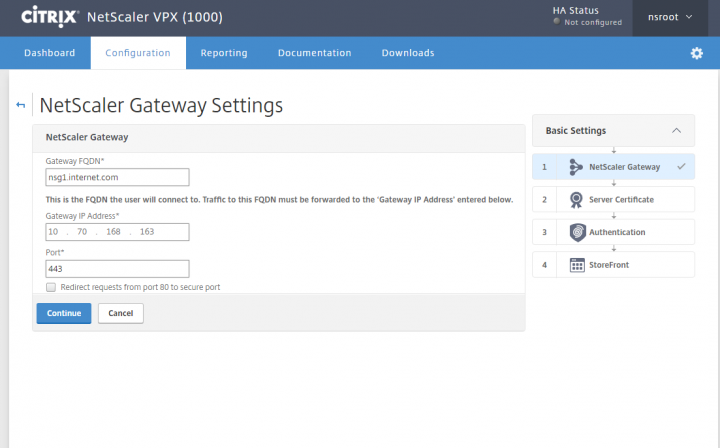
Given the Gateway Fqdn name and IP address as follows:
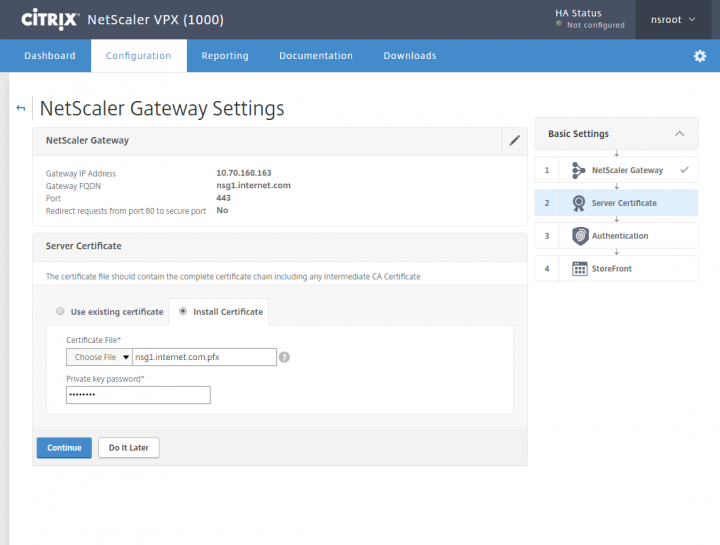
Next, install a server certificate to bind with this VServer configuration. The certificate file used here is already imported pfx format and available on the local machine accessed.
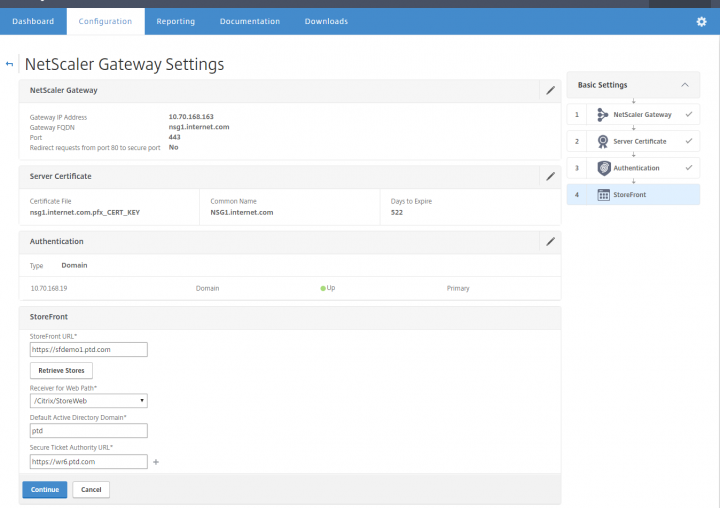
The next step is to bind Simplified Gateway users to an authentication server. Select Authentication type required and carry with configuring one.

Enter the StoreFront host URL to retrieve Stores available, Active Directory Domain name and also Secure Ticket Authorities (STA) URL applicable.
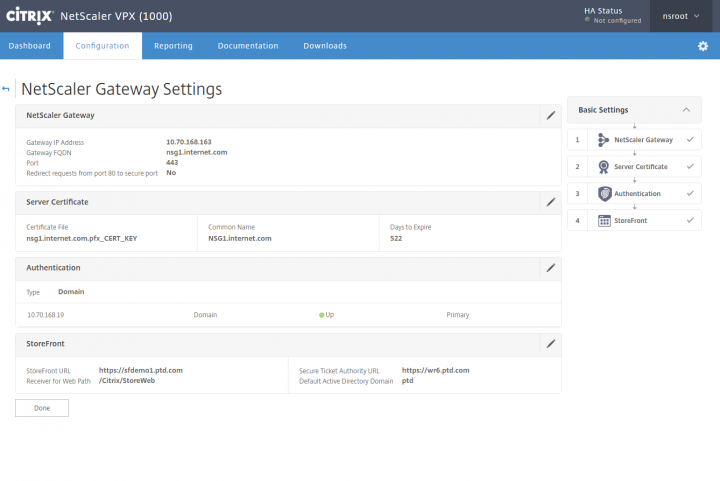
Step 3 – Complete Virtual Server wizard and export the configuration file
Click Done to finish the configuration wizard for the NetScaler Gateway and StoreFront setup.
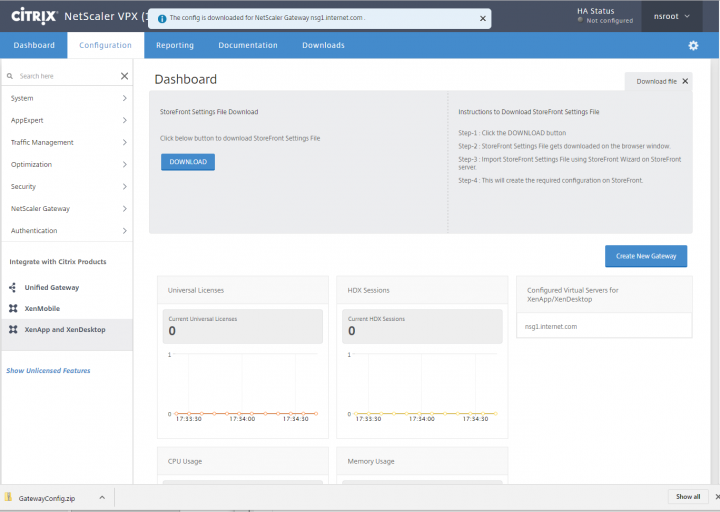
Click on the Download button to save the GatewayConfig.zip into the local machine accessed.
Step 4 – Import the configuration file to StoreFront
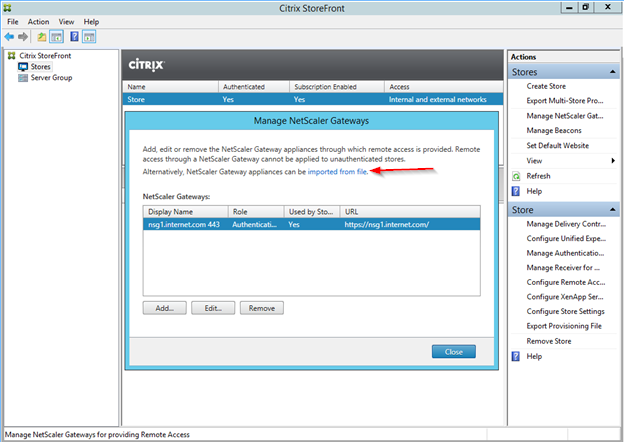
Then the Storefront Administrator is provided with this above exported gateway configuration zip file to be used into the system. To import a NetScaler configuration using Admin Console as steps below,
- Select Configure NetScaler Gateways Settings task in the right pane.
- Select imported from file link on dialog window.
- Select the NetScaler Configuration Zip File to import.
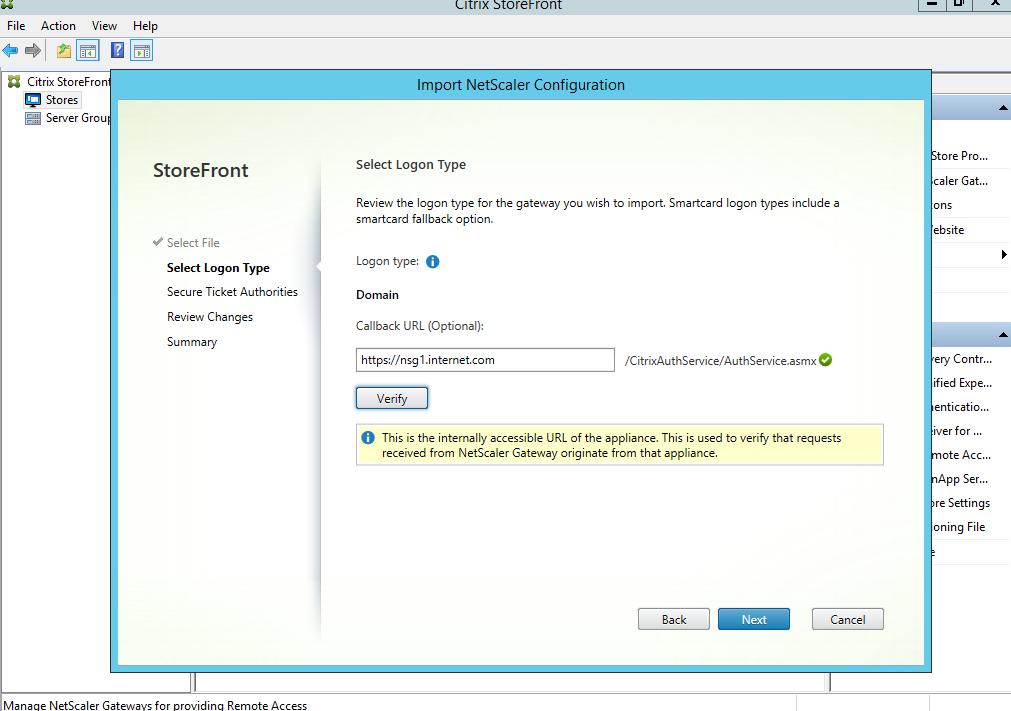
- Select Logon type and the enter Callback URL if required to make sure the internally accessible URL of appliance.
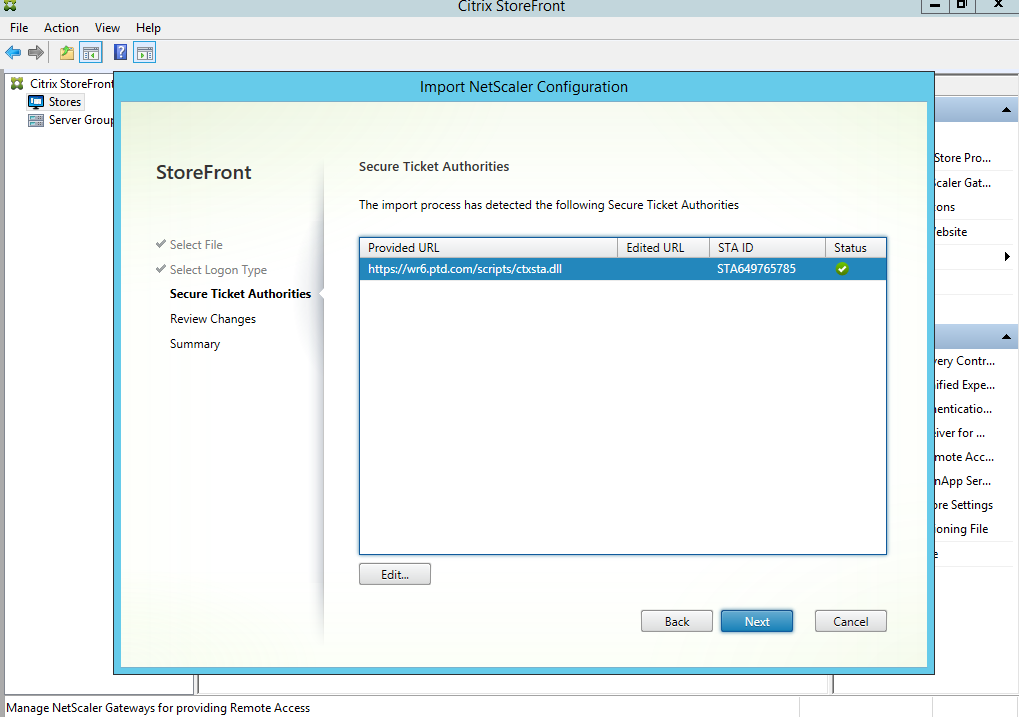
- Select edit to change the Secure Ticket Authority URL if not contactable
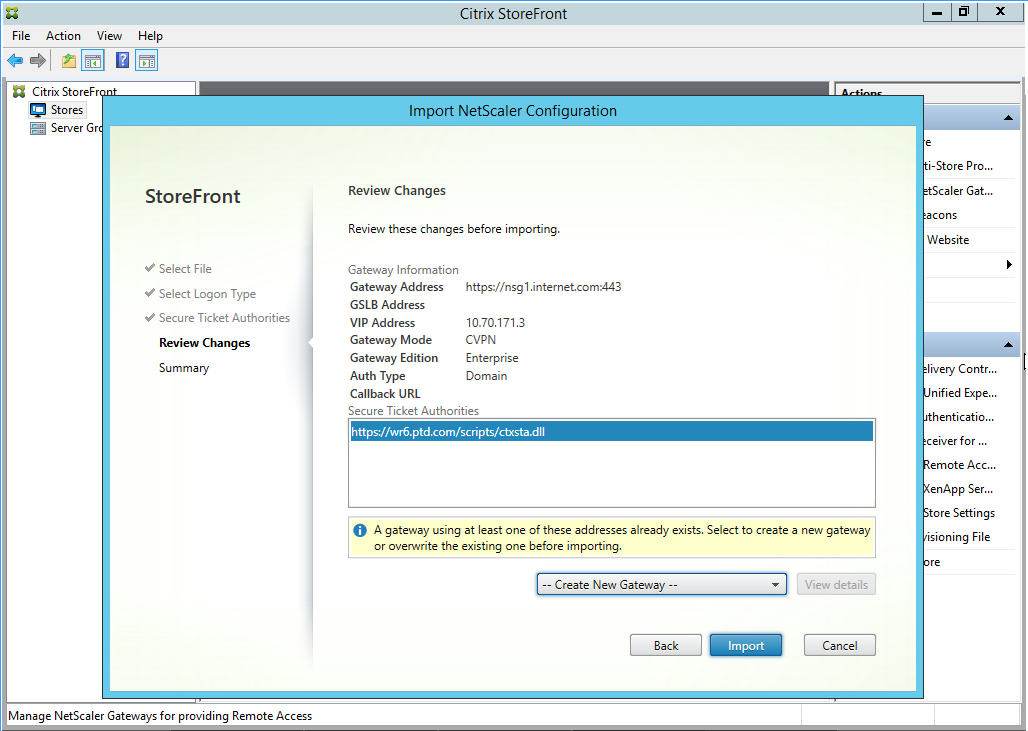
- In the Review changes dialog if you want the existing gateway to overwrite or to create a new gateway, select the drop box option correspondingly.
- Enter the zone name in the pop-up dialog and select OK.
- Select Import to continue importing NetScaler configuration.
- Select Finish to confirm the import complete.
The import NetScaler configuration UI wizard validates the input, including STA information provided and also given edit option if STA host URL or callback URL is not resolvable.
And at the end of import process StoreFront automatically configures the relevant store for remote access.
Also bear in mind that this import config only works with a single virtual server and if there are multiple NetScaler Gateway virtual servers exist, currently only the first one will be imported by StoreFront.
Last not least, the Administrator can automate this NetScaler configuration import process on the StoreFront using the PowerShell cmdlet Import-STFNetScalerConfiguration, which syntax is:
Import-STFNetScalerConfiguration [-Configuration] <NetScalerConfigurationDocument> [[-PropagateChanges] <SwitchParameter>] [[-RoamingGatewaysToOverwrite] <RoamingGateway[]>] [[-CreateNew] <SwitchParameter>] [[-LogonType] <Domain | RSA | DomainAndRSA | SMS | SmartCard | SmartCardDomain | SmartCardRSA |SmartCardDomainAndRSA | SmartCardSMS>] [[-CallbackUrl] <String>] [<CommonParameters>]
Configuration is a PowerShell NetScaler configuration document object to be imported into StoreFront. PropagateChanges is a parameter to propagate configuration changes to other members of the cluster. This is not required if it is a single node deployment. RoamingGatewaysToOverwrite is a parameter to specify gateways that should be overwritten if the import finds more than one matching gateway that will be overwritten by the import. Or else use CreateNewparameter to specify that a new gateway should be created rather than update an existing gateway. LogonType parameter is to mention the logon type for a gateway overriding whatever is specified in the configuration document. CallbackUrl is a parameter given for optional callback URL to replace the suggested URL if it cannot be resolved.
The following code example would import a NetScaler configuration to a StoreFront deployment:
$netscalerConfiguration = Read-STFNetScalerConfiguration -Path C:\NSG\Configuration.zip
$stasToUpdate = Test-STFSecureTicketAuthority -StaConfigurationObject $netscalerConfiguration
Import-STFNetScalerConfiguration -Configuration $netscalerConfiguration